In this post, we’re going to create an off the shelve object detector using OpenCV and TensorFlow for Scala. The detector will be able to detect common objects like people in still images and videos. It will also be able to run on a live video stream captured from your webcam.
Object detection
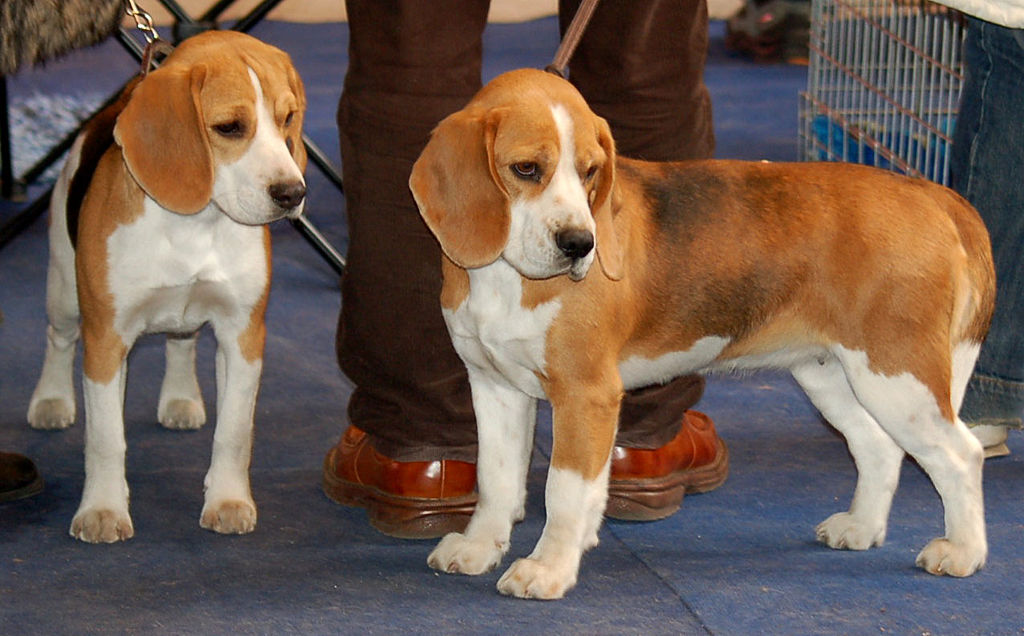
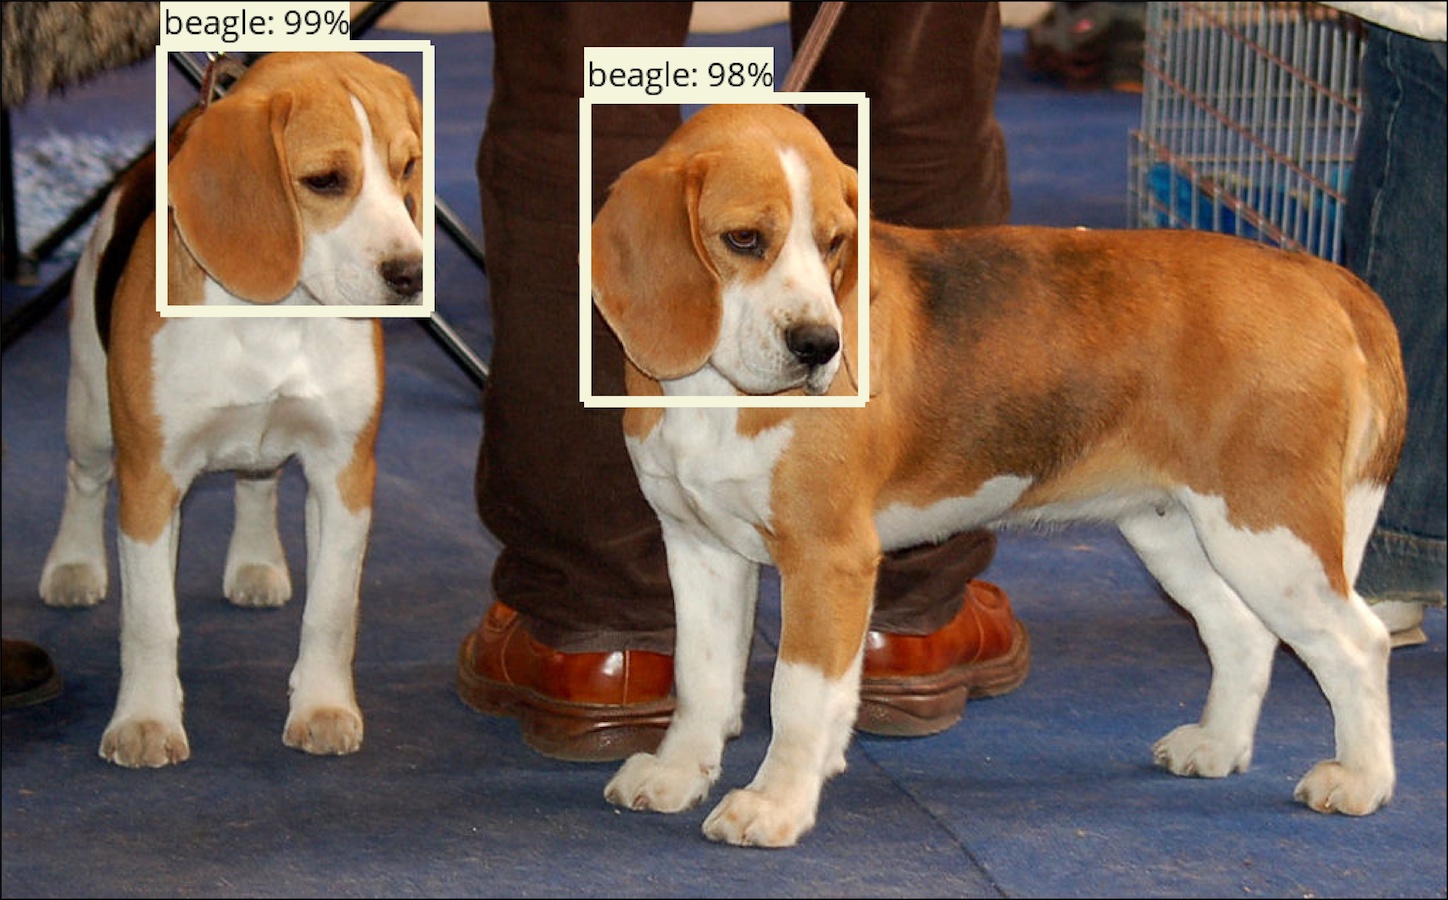
In the previous post we talked about image recognition (or image classification). Image recognition is about recognizing what the content of an image is. In object detection, we want to predict where one or multiple objects are located in an image. Usually when we say object detection we mean recognition and localization together. I.e. we want a neural net to tell us that the image contains a beagle, and to also tell us the location of the beagle within the image.


In most cases, a neural network is trained to predict the coordinates of the rectangle surrounding an object, called bounding box, and to classify the object within that bounding box. The classification part is almost always done using a convolutional neural network. For the bounding box predictions, several approaches exist with different speed and accuracy characteristics. Object detection is an area of active research, and the state of the art is advancing rapidly.
A task related to object detection is semantic segmentation, in which you basically try to classify each pixel of an image. Instance segmentation is the combination of semantic segmentation and object detection that distinguishes between different objects of the same class.

In our example, we’ll stick with the simpler object detection using bounding boxes. Furthermore, we’re going to cheat a little bit to make our life even easier by skipping training entirely. Instead, we’ll use TensorFlow for Scala to load a pretrained model from the TensorFlow object detection API model zoo and run it on our input images.
The TensorFlow Object Detection API
According to its Readme, “the TensorFlow Object Detection API is an open source framework built on top of TensorFlow that makes it easy to construct, train and deploy object detection models.” The API is written in Python.
If you like, you can also use the TensorFlow object detection API to train a model on your own dataset instead of using a pretrained one. Doing so allows you to use your own classes, and a model that matches your data much better. The downside is that you have to provide your own training data, and convert it into the TFRecord format that TensorFlow can read. Once you’ve done that, there’s no code required to run training. Have a look at their documentation for details.
The API currently supports two model families named SSD (Single Shot Detector) and faster R-CNN (Regional Convolutional Neural Network). SSD is comparatively fast, enabling real time detection even on a CPU, while R-CNN is more accurate, albeit slower. For both model families multiple convolutional neural network variants like resnet or inception are available, providing different tradeoffs between speed and accuracy.
Most of the pretrained models are based on the COCO dataset containing 300k images of 90 common objects. You can see which classes are available in the COCO dataset here. A few pretrained R-CNN models are also available for the openimages and kitti datasets.
Building an Object Detector
Now that we have seen a brief overview of object detection, let’s get started with our example. We’ll use the computer vision library OpenCV to for image and video IO. While OpenCV is written in C++, there’s a nice Java wrapper called JavaCV available. SBT-JavaCV is an SBT plugin that automatically chooses the right OpenCV dependency for your platform and architecture, so you don’t have to worry about installing or compiling OpenCV yourself. To learn more about JavaCV, check out the great JavaCV examples ported from the OpenCV2 Cookbook written in Scala.
The actual detection is done using TensorFlow for Scala. Right now, it runs on Linux and Mac. For Linux it also has CUDA support for running on the GPU. If you want to try the example yourself, make sure you you use the right classifier for the TensorFlow binaries in your build.sbt.
The full source code (including imports) of this example is available on GitHub.
As a first step, we load the pretrained serialized model from disk and create a TensorFlow graph from it. We then create a session with that graph, which allows us to later run the model on our input.
val modelDir = args.lift(2).getOrElse("ssd_inception_v2_coco_2017_11_17")
// load a pretrained detection model as TensorFlow graph
val graphDef = GraphDef.parseFrom(
  new BufferedInputStream(new FileInputStream(new File(new File("models", modelDir), "frozen_inference_graph.pb"))))
val graph = Graph.fromGraphDef(graphDef)

// create a session and add our pretrained graph to it
val session = Session(graph)
We also have to load the mapping from the numeric class identifiers to human readable labels such as “cat” (remember neural networks operate on numeric tensors). For now, we just load labels from the COCO dataset. The labels are encoded as protocol buffers, and we use the great ScalaPB library to parse it.
// load the protobuf label map containing the class number to string label mapping (from COCO)
val labelMap: Map[Int, String] = {
  val pbText = Source.fromResource("mscoco_label_map.pbtxt").mkString
  val stringIntLabelMap = StringIntLabelMap.fromAscii(pbText)
  stringIntLabelMap.item.collect {
    case StringIntLabelMapItem(_, Some(id), Some(displayName)) => id -> displayName
  }.toMap
}
Before we can run our model we need another helper to convert our image from the Mat OpenCV operates on, to a TensorFlow Tensor.
// convert OpenCV tensor to TensorFlow tensor
def matToTensor(image: Mat): Tensor = {
  val imageRGB = new Mat
  cvtColor(image, imageRGB, COLOR_BGR2RGB) // convert channels from OpenCV GBR to RGB
  val imgBuffer = imageRGB.createBuffer[ByteBuffer]
  val shape = Shape(1, image.size.height, image.size.width(), image.channels)
  Tensor.fromBuffer(UINT8, shape, imgBuffer.capacity, imgBuffer)
}
The detect method is where the actual detection takes place. Here we run our neural network in inference mode. It takes a TensorFlow Tensor, a Graph, and a Session as input. It first retrieves the placeholder tensors from the graph that will be used for input and output, and then sets the image tensor as input parameter. Finally, it runs the graph (the detection model) within the given session. The returned value is a bunch of tensors containing the bounding box coordinates as well as their confidence scores and classes.
// run the object detection model on an image
def detect(image: Tensor, graph: Graph, session: Session): DetectionOutput = {

  // retrieve the output placeholders
  val imagePlaceholder = graph.getOutputByName("image_tensor:0")
  val detectionBoxes = graph.getOutputByName("detection_boxes:0")
  val detectionScores = graph.getOutputByName("detection_scores:0")
  val detectionClasses = graph.getOutputByName("detection_classes:0")
  val numDetections = graph.getOutputByName("num_detections:0")

  // set image as input parameter
  val feeds = Map(imagePlaceholder -> image)

  // Run the detection model
  val Seq(boxes, scores, classes, num) =
    session.run(fetches = Seq(detectionBoxes, detectionScores, detectionClasses, numDetections), feeds = feeds)
  DetectionOutput(boxes, scores, classes, num)
}
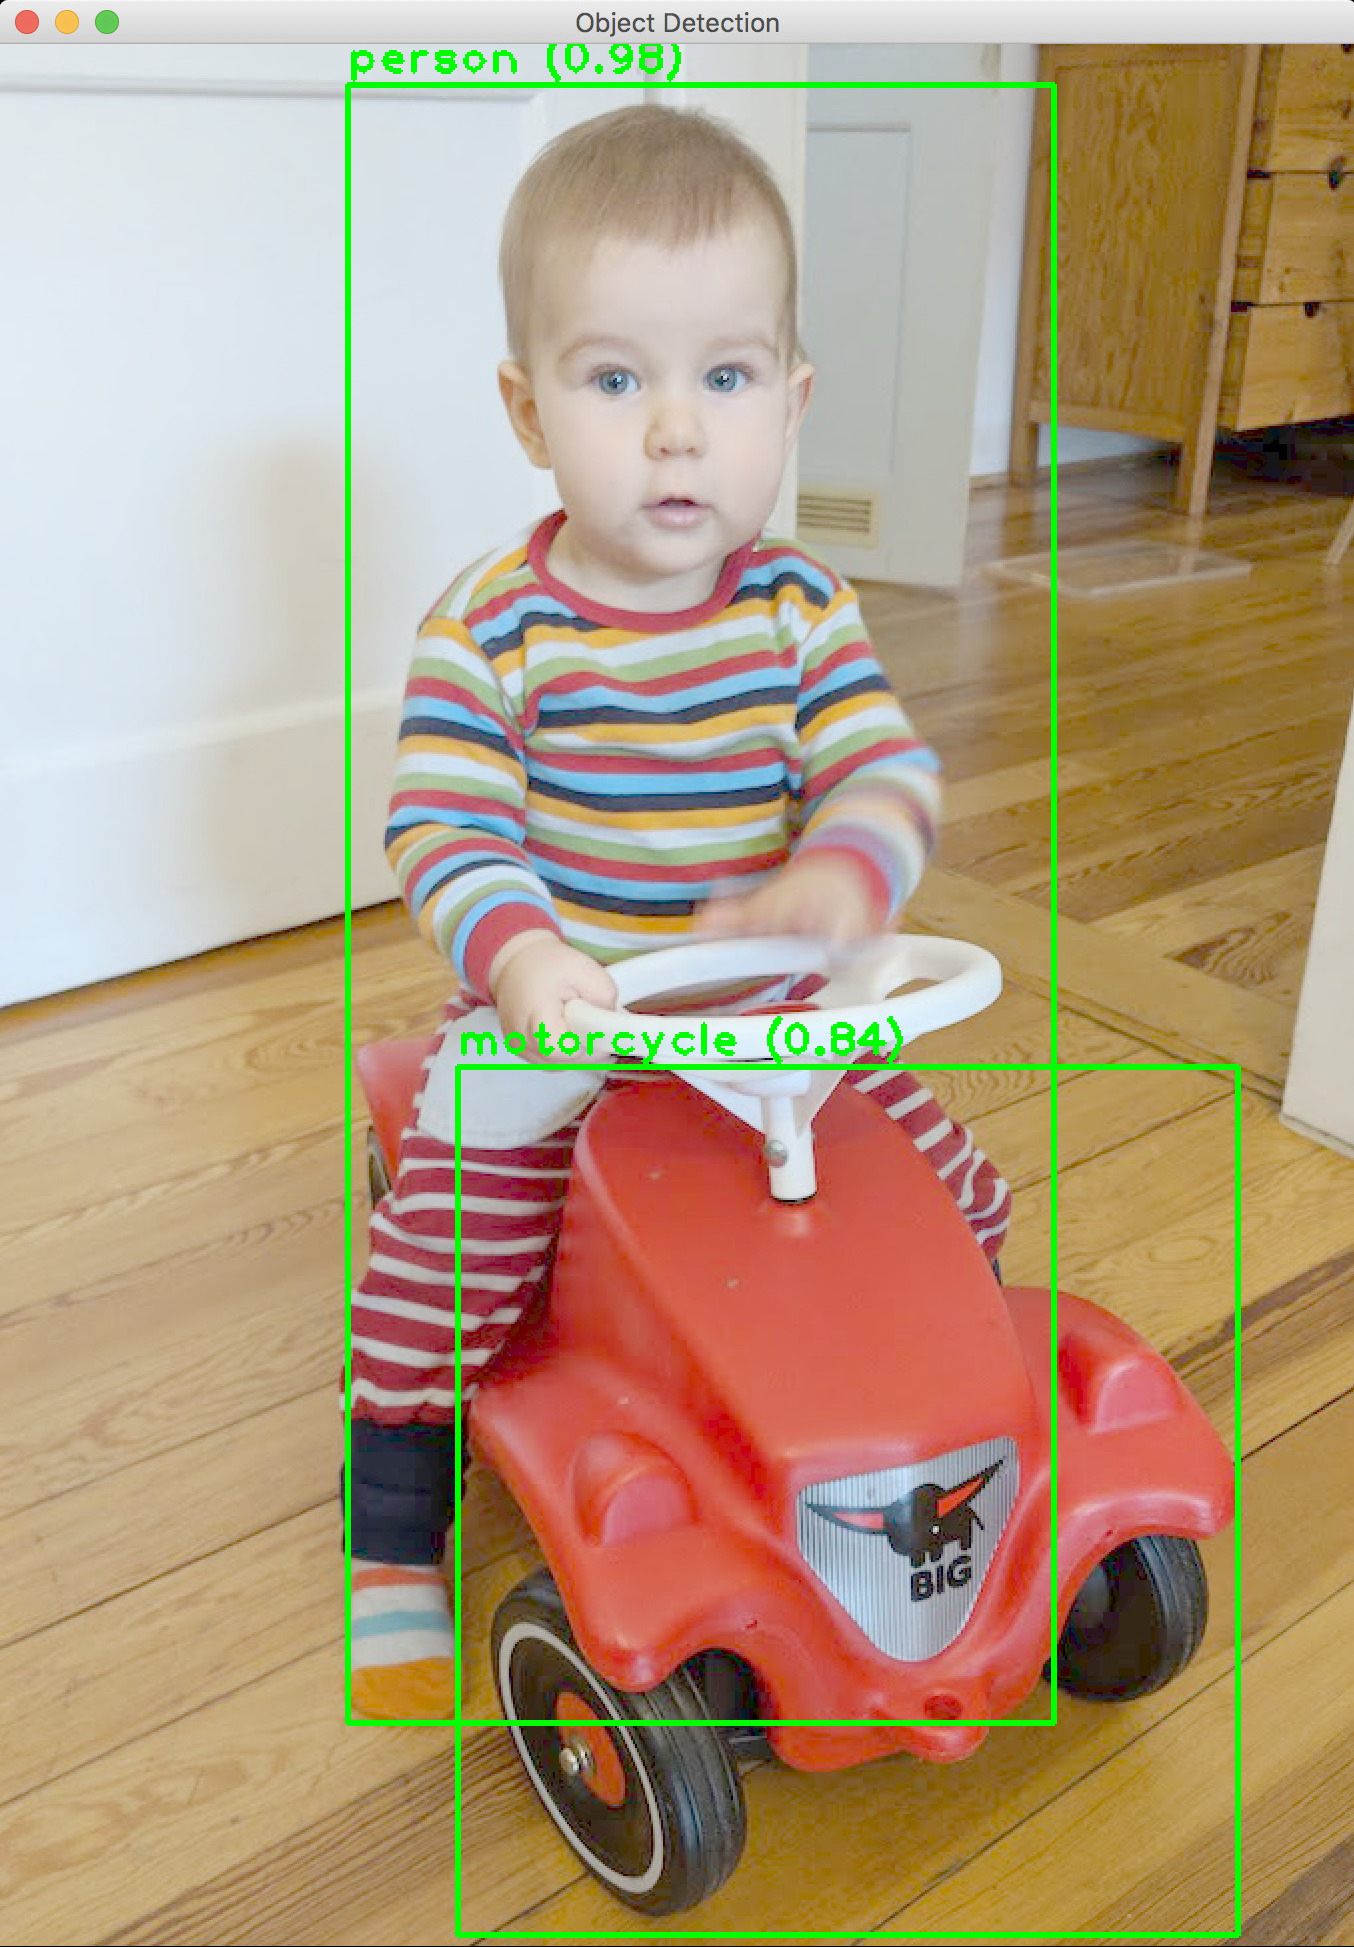
The drawBoundingBoxes method is responsible for drawing bounding boxes, scores and classes on top of the original image. We extract the values from our DetectionOutput, and then use on OpenCV’s drawing primitives. We only draw boxes whose confidence score exceeds a certain threshold (0.5 here).
// draw boxes with class and score around detected objects
def drawBoundingBoxes(image: Mat, labelMap: Map[Int, String], detectionOutput: DetectionOutput): Unit = {
  for (i <- 0 until detectionOutput.boxes.shape.size(1)) {
    val score = detectionOutput.scores(0, i).scalar.asInstanceOf[Float]

    if (score > 0.5) {
      val box = detectionOutput.boxes(0, i).entriesIterator.map(_.asInstanceOf[Float]).toSeq
      // we have to scale the box coordinates to the image size
      val ymin = (box(0) * image.size().height()).toInt
      val xmin = (box(1) * image.size().width()).toInt
      val ymax = (box(2) * image.size().height()).toInt
      val xmax = (box(3) * image.size().width()).toInt
      val label = labelMap.getOrElse(detectionOutput.classes(0, i).scalar.asInstanceOf[Float].toInt, "unknown")

      // draw score value
      putText(image,
        f"$label%s ($score%1.2f)", // text
        new Point(xmin, ymin - 6), // text position
        FONT_HERSHEY_PLAIN, // font type
        1.5, // font scale
        new Scalar(0, 255, 0, 0), // text color
        2, // text thickness
        8, // line type
        false) // origin is at the top-left corner
      // draw bounding box
      rectangle(image,
        new Point(xmin, ymin), // upper left corner
        new Point(xmax, ymax), // lower right corner
        new Scalar(0, 255, 0, 0), // color
        2, // thickness
        0, // lineType
        0) // shift
    }
  }
}
Running the detector on a single image is now as simple as creating a minimal UI for display (we make use of JavaCV’s CanvasFrame here ), then call detect and drawBoundingBoxes with the appropriate arguments.
// run detector on a single image
def detectImage(image: Mat, graph: Graph, session: Session, labelMap: Map[Int, String]): Unit = {
  val canvasFrame = new CanvasFrame("Object Detection")
  canvasFrame.setDefaultCloseOperation(JFrame.EXIT_ON_CLOSE) // exit when the canvas frame is closed
  canvasFrame.setCanvasSize(image.size.width, image.size.height)
  val detectionOutput = detect(matToTensor(image), graph, session)
  drawBoundingBoxes(image, labelMap, detectionOutput)
  canvasFrame.showImage(new OpenCVFrameConverter.ToMat().convert(image))
  canvasFrame.waitKey(0)
  canvasFrame.dispose()
}
If we want to run the detector on a video stream from a file or camera, the OpenCVFrameGrabber allows us to extract single video frames as images. We can feed these frames into the detector and draw bounding boxes just as we did in the single image case above.
// run detector on an image sequence
def detectSequence(grabber: FrameGrabber, graph: Graph, session: Session, labelMap: Map[Int, String]): Unit = {
  val canvasFrame = new CanvasFrame("Object Detection", CanvasFrame.getDefaultGamma / grabber.getGamma)
  canvasFrame.setDefaultCloseOperation(JFrame.EXIT_ON_CLOSE) // exit when the canvas frame is closed
  val converter = new OpenCVFrameConverter.ToMat()
  grabber.start()
  for (frame <- continually(grabber.grab()).takeWhile(_ != null
    && (grabber.getLengthInFrames == 0 || grabber.getFrameNumber < grabber.getLengthInFrames))) {
    val image = converter.convert(frame)
    if (image != null) { // sometimes the first few frames are empty so we ignore them
      val detectionOutput = detect(matToTensor(image), graph, session) // run our model
      drawBoundingBoxes(image, labelMap, detectionOutput)
      if (canvasFrame.isVisible) { // show our frame in the preview
        canvasFrame.showImage(frame)
      }
    }
  }
  canvasFrame.dispose()
  grabber.stop()
}
Finally, we build a simple command line application, which allows us to run the detector on either an image, a video file or on a live webcam stream.
def printUsageAndExit(): Unit = {
  Console.err.println(
    """
      |Usage: ObjectDetector image <file>|video <file>|camera <deviceno> [<modelpath>]
      |  <file>      path to an image/video file
      |  <deviceno>  camera device number (usually starts with 0)
      |  <modelpath> optional path to the object detection model to be used. Default: ssd_inception_v2_coco_2017_11_17
      |""".stripMargin.trim)
  sys.exit(2)
}

inputType match {
  case "image" =>
    val image = imread(args(1))
    detectImage(image, graph, session, labelMap)
  case "video" =>
    val grabber = new FFmpegFrameGrabber(args(1))
    detectSequence(grabber, graph, session, labelMap)
  case "camera" =>
    val cameraDevice = Integer.parseInt(args(1))
    val grabber = new OpenCVFrameGrabber(cameraDevice)
    detectSequence(grabber, graph, session, labelMap)
  case _ => printUsageAndExit()
}
You can check out the project and run it yourself using sbt:
$ git clone https://github.com/sbrunk/scala-deeplearn-examplesFor now, you have to download and extract the model you want to run yourself first from the object detection model zoo, like so:
$ cd scala-deeplearn-examples/tensorflow
$ mkdir models && cd models
$ wget http://download.tensorflow.org/models/object_detection/ssd_inception_v2_coco_2017_11_17.tar.gz
$ tar xzf ssd_inception_v2_coco_2017_11_17.tar.gz
$ cd ../..
Then you should be able to run the detector:
$ sbt 'tensorFlow/runMain io.brunk.examples.ObjectDetector image <filename>' # Run on an image (i.e. try example_image.jpg)
$ sbt 'tensorFlow/runMain io.brunk.examples.ObjectDetector camera 0'         # Run on your webcam
$ sbt 'tensorFlow/runMain io.brunk.examples.ObjectDetector video <filename>' # Run on a video
Now you’ve seen how it looks like to create a simple object detector in ~150 lines of Scala code. The neural networks used here are almost state of the art, and I find the results already quite impressive. While we didn’t cover training here, it’s not too difficult using the TensorFlow Object Detection API, given training data in the right format. It would also be interesting to investigate how much work is required to run training using the TensorFlow Scala API.
I encourage you to check out the project, try different options, play with the source code, fork it, train on your own data, share your experiences, send a PR with enhancements. Most importantly, have fun :). If you have feedback or questions, please use the comment function below or ping me on Twitter @soebrunk.